> For the complete documentation index, see [llms.txt](https://smartpossdk.gitbook.io/cloudpossdk/llms.txt). Markdown versions of documentation pages are available by appending `.md` to page URLs; this page is available as [Markdown](https://smartpossdk.gitbook.io/cloudpossdk/faq/firmware/update-firmware.md).
# Update Firmware
### Overview
This guide details the methods to update the firmware on WizarPOS devices. Ensure that the firmware package is obtained from WizarPOS. Here are the Methods of Updating Firmware.
### Using a TF-Card (When Terminal is Off)
* Preparation:
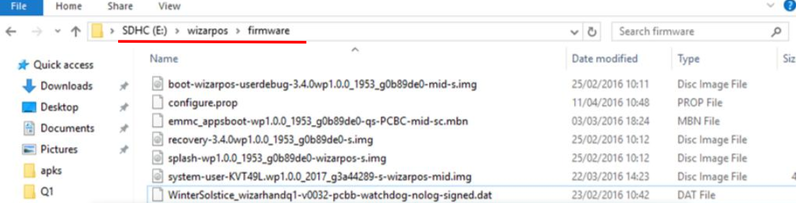
* Format a 4G to 16G TF-Card to FAT32 and name the folder 'wizarpos' (in lowercase). Refer to [TF(Micro SD) Card Suggestion](/cloudpossdk/faq/hardware-repair/tf-micro-sd-card-suggestion.md) for compatible card types.
* Ensure the folder structure on your TF-Card matches the example provided
* Update Process:
* Power off the terminal and remove the battery.
* Insert the prepared TF-Card into the terminal.
* Power on the terminal. The update will commence automatically.
* After the update, the terminal restarts. Verify the update by checking the 'Build number' and 'Kernel version' in 'Settings > About POS'.
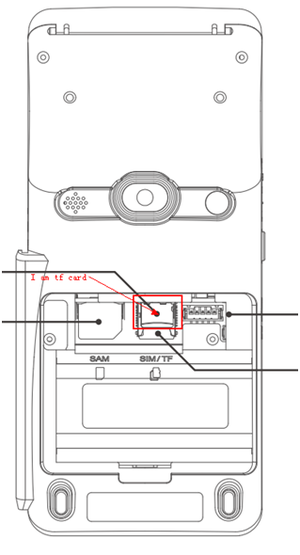
* TF-card Location in Q2
* TF-card Location in WizarPOS Q3
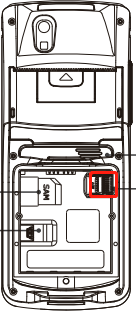
* TF-card Location in WizarHand Q1
### Using a Thumb Drive
* Requirements:
* Ensure the PosSysAssistant application version is at least 2.11.22.
* Preparation:
* Create a directory "\cloudpos\image" on the thumb drive.
* Depending on the firmware package's root folder, copy the 'xxx.zip' file accordingly (refer to detailed instructions).
* Update Process:
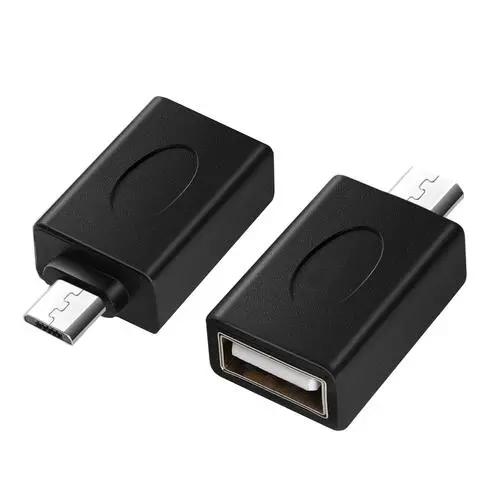
* Connect the thumb drive to the terminal using an OTG-USB host converter.
thumb drive
otg-usb convertor
* Click system update to select the firmware file from the pop-up message.
* Click Confirm to copy the firmware to internal storage, restart the terminal to apply the update.
* Verify the update in 'Settings > About POS'.
### Using a TF-Card (When Terminal is On)
* Follow the same steps as the thumb drive method.
* Note: This method is not applicable for Wizarhand Q1 models as the battery must be removed to insert the TF-Card.
### Using WizarView
* For remote firmware updates, refer to [Update Firmware](/cloudpossdk/faq/tms-wizarview/update-firmware-remotely.md)[ Remotely](/cloudpossdk/faq/tms-wizarview/update-firmware-remotely.md).
### Using Application Interface
* WizarPOS provides an AIDL interface for third-party applications to update system firmware.
* Refer to the attached [documentation](https://ftp.wizarpos.com/advanceSDK/UpdateSystemDescription_1.1.docx) and [Demo](https://github.com/SmartPOSSamples/SystemUpdateTest) for guidance. Note that the firmware system package must be obtained from WizarPOS.
Post-Update Verification:After any update method, confirm the new 'Build number' and 'Kernel version' in 'Settings > About POS' to ensure the update was successful.